 SectionHiker.com Backpacking Gear Reviews and FAQs
River and stream crossings can be intimidating for many hikers, even on small streams where the consequences of getting wet or falling are minor. Here are 9 expert tips for river and stream crossings that can help you master this important wilderness hiking skill.
1. Unbuckle your hip belt and sternum strap
If you’re carrying a backpack, unbuckle your hip belt and sternum strap before you cross a fast-moving stream or river. Otherwise, there’s a real chance that your pack will fill up with water if you fall and the added weight can hold you underwater. By undoing your hip belt, it’s easier to shrug off your pack if you need to eject it.
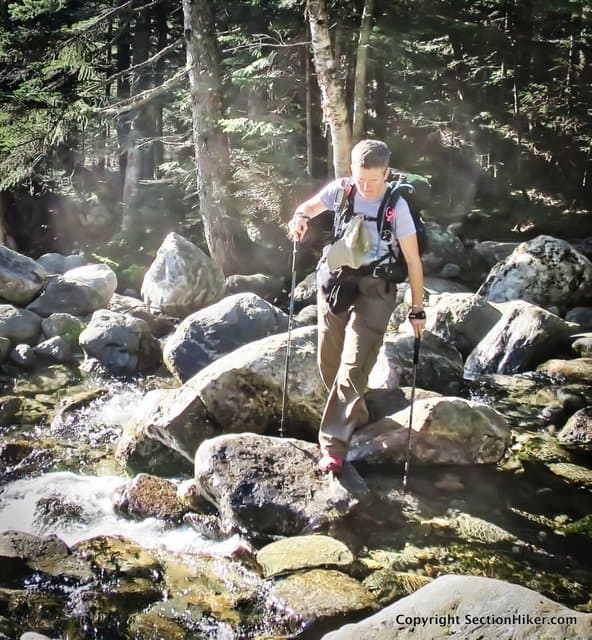
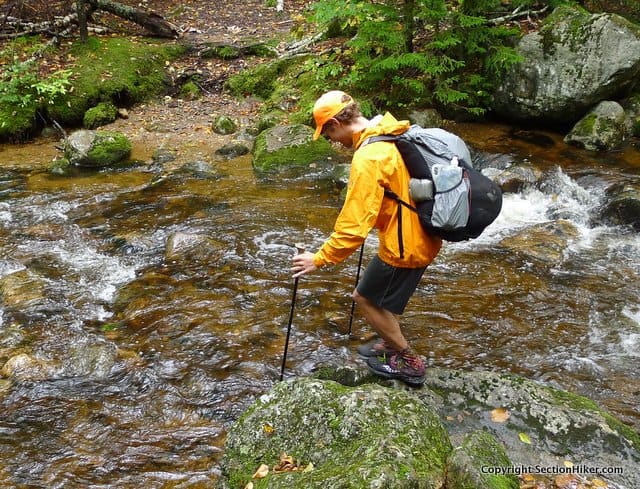
2. Face upstream and use trekking poles to maintain your balance
Trekking poles are very helpful in maintaining your balance during a stream crossing and for probing the bottom to find hidden rocks or holes that can trip you up. Facing upstream lets you see where the fastest current is in a stream and how to avoid it.

3. Cross on shorter rocks, not taller ones
While it’s tempting to clamber over big rocks during a stream or river crossing, it’s often better to cross on shorter and lower rocks closer to the surface than bigger and taller ones, even if they’re partially submerged. You’ll be able to control your momentum better if you’re lower down and you won’t fall as far or hard if take a spill.

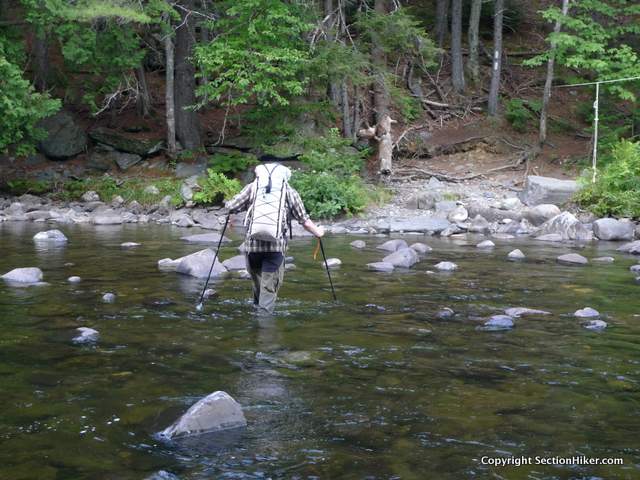
4. The marked route might not be the best place to cross
River and stream beds change year to year due to floods and erosion. If the position of the river crossing on a map looks sketchy, perhaps because the riverbed has changed in the interim, you don’t have to cross there. Feel free to hike upstream or downstream and try to find a better crossing point that’s shallower, has a slower current, or has a better route across the rocks.

5. Pointy rocks provide a better foothold than flat rocks
When crossing a stream, people look for flat rocks to put their feet on under the assumption that they’ll be easier to walk across. But flat rocks can be very slippery when they’re wet. You can usually get a better grip by walking across more pointy rocks, even if they’re wet because your shoe soles will bend a little on top of them and grip them more securely. Try it sometime.
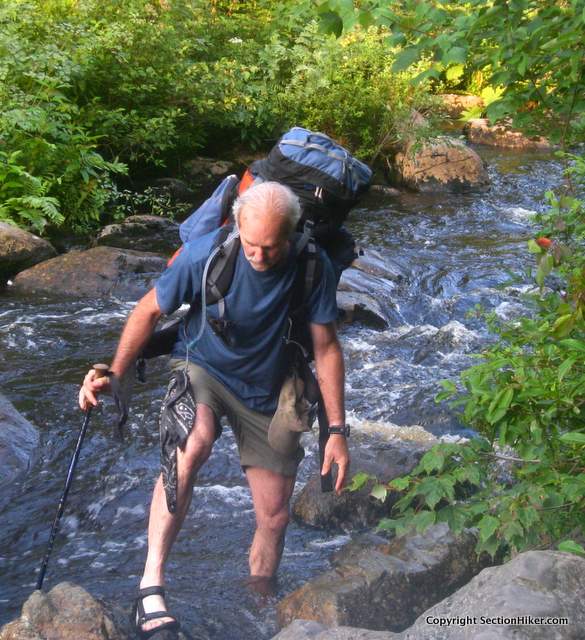
6. Wear footwear for protection
It’s important to wear some sort of foot protection during a stream or river crossing to protect your feet from injury, even if it means carrying a pair of waterproof camp shoes like Crocs with you. River and streambeds are full of sharp rocks, broken sticks, and thorns. If you won’t hike barefoot on dry ground, what makes you think it’s any safer to cross a stream barefoot when you can’t see your feet or the river bottom clearly?
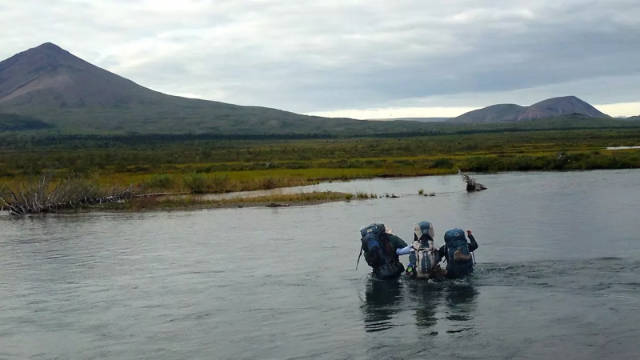
7. Wait for high water to drop to a safer level
Fording a river or stream that’s running high from rainfall or is a raging torrent from snowmelt is dangerous and unnecessary. High water levels usually fall quickly and waiting for the level to drop is safer even if it means a delay. High water also carries with it hidden wood and subsurface debris that can injure, entrap or drown you during a crossing. Proper planning before your hike can help you anticipate high water crossings, so you can build delays into your route and resupply plan. What water level is too high? I wait out water levels that are higher than mid-thigh or I move to a safer crossing point.
8. Make sure beaver dams are solid before you try to cross them
Beaver dams can provide a convenient way across a stream as long as they haven’t been damaged and are still actively maintained. If you see a hole in the dam or a spot when it’s been breached and water is flowing through it quickly, find another place to cross. Chances are it’s not structurally sound enough to hold your body weight.

9. Wear trail shoes that drain and dry quickly
Many backpackers wear trail shoes that drain and dry quickly because getting your shoes wet during a stream or river crossing is often unavoidable. If you plan to hike somewhere where there are a lot of stream crossings, you can save yourself a lot of time and hassle by wearing mesh trail runners or mids that don’t have waterproof breathable liners. They’ll dry much faster when water comes over the top of your ankles and swamps your shoes.
Three points of contact is key in all of these situations. Enjoyed this one!
Given that it’s going to be 92 degrees outside, I plan on practicing my river crossing skills today!
I found another use for my Cnoc bag this past weekend on a semi-desolation loop. They make a very good dousing bag!
If you’re fording salt or brackish water near the sea, be sure to wash the off your poles right after. As that any stainless steal parts can still rust very quickly when exposed to salt water. There’s a limit to the magic of stainless apparently.
Very timely for my impending 100MW hike, which starts in 10 days!!! AAAAAAA!!!!!
((Un)fortunately there’s a drought of course, so at least we likely won’t have too many scary fords (thunderstorms not withstanding). Gonna be a bit tricky finding drinking water, perhaps, but I’m a camel so I should be fine.)
#1 and #6 are from the 100 mile wilderness.
I’ll report back on how high (low) they are this year. :-)
Good points! Another is to choose a crossing point without downstream hazards, such as rapids, falls, or strainers. Also, cross where the stream is wider and therefore shallower.
Releasing the hip and sternum straps is valid advice. I slipped and fell into a 3’ deep hole backwards while packing out a deer in remote backcountry late at night in an area with no cell service at 14 degrees F and a foot of snow on the ground. I had a heck of a time wrestling that pack off of me. I was like a turtle on my back in the creek and my head was underwater for a bit.
Great advice that I will remember crossing streams during our hikes in Kluane National Park in the Yukon in a few weeks.
Agree with Lawrence! Also… With faster streams, my wife and I have found it helpful to link arms, giving us more stability, each with a trekking pole in the outside (free) hand, This gives us 6 points of contact and we move(shift) only one of them at a time. Very stable!
If you’re fording salt or brackish water near the sea, be sure to wash off your poles right after. As that any stainless steal parts can still rust very quickly when exposed to salt water. There’s a limit to the magic of stainless apparently.
This brought up a point not often discussed, which hiking boots/shoes dry out the quickest,
The one in zero humidity…
No trekking poles? Pick up one or two long branches as you approach the first crossing. Consider keeping them if you have several more streams ahead.
Cross at a roughly downstream angle, if you can. You’ll get pushed that way anyway.
Never, ever cross a river with a rope attached to you and something else. People have died that way.
In a group? One person at a time for easier crossings, so others can help if something happens. Harder crossings – link arms for doubles or triples, strongest upstream.
Avoid “holes” in the streambed, often just downstream of big rocks. One wrong step and you could easily get dunked far deeper than desired, then held down in the current. Probe ahead with a trekking pole or branch if unsure.
Highest water from snowmelt is usually in the afternoon. But that depends on how far the snow is. River water travels roughly 3 mph. Snow 6 miles upstream will peak about 2 hours later.
Unbuckling hip belts has pros and cons. With higher total pack weight, I’m a lot less stable unbuckled, so often cross buckled. Use good judgement, based on experience in easier crossings.
Teetering across a stream on a log is pretty hard, and falling can cause injury. Consider crossing just downstream, leaning on the log for support.
Don’t even think about swimming across a wide swift river, unless you have the right training, experience, and equipment. It’s a LOT harder than it looks.
Most modern trail running shoes drain pretty well. Just wear them to cross, dump excess water on the other side, and learn to love squishy shoes until they dry out. Or not. I’ve done six days in squishy trail runners and came out OK.