MSR has a new class of double-wall inner tents called fast and light tent “bodies” which are inner tents without any mesh, designed to reduce gear weight and provide more wind and rain-splatter protection than pitching the fly in a fast and light footprint configuration. Unlike footprints, the tent bodies have bathtub floors and sidewalls just like a regular inner tent. They are not footprints themselves and provide no added durability beyond a regular inner tent floor.

MSR makes these new tent bodies for their Hubba, Hubba Tour, Freelite, Carbon Reflex model tents. The tent bodies work best with the Hubba, Freelite, and Hubba Tour models which have Y-shaped end poles connected with a hub. The tent bodies have hooks that attach to the poles above the hubs, so they don’t slide down. Here’s a video that illustrates tent body setup with the hubbed pole architectures.
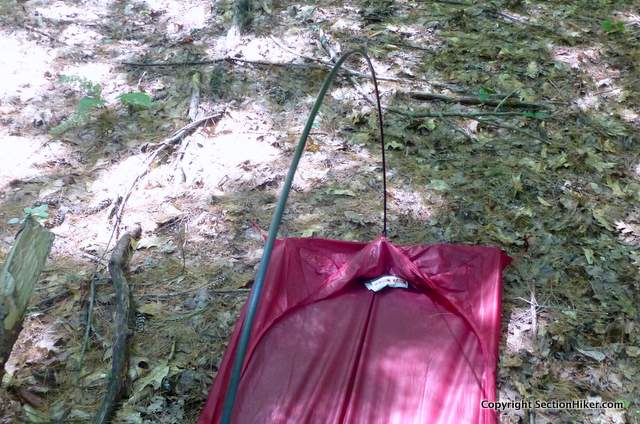
The MSR Carbon Reflex tents differ from the Hubba, Freelite, and Hubba Tour series because they don’t have hubbed end poles. They have a single pole that hooks into a grommet in the middle of the inner tent floor instead. This little detail isn’t documented anywhere and threw me for a loop when I tried to set the tent body up on a overnight trip. Consider this review a head-ups if you have a Carbon Reflex and have been considering this add-on.

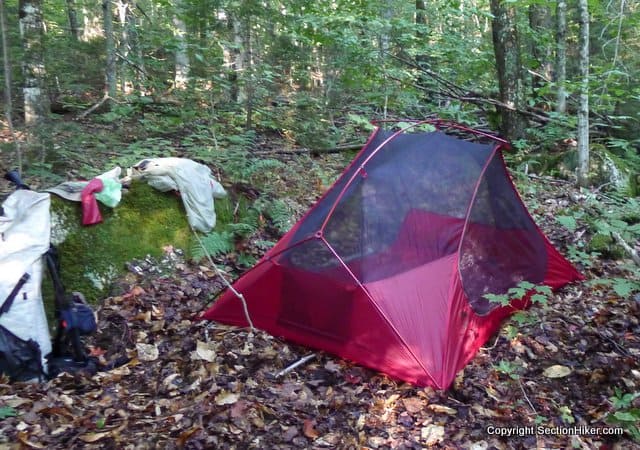
Instead, you need to first attach the pole to the rain fly using the velcro tabs that connect it to the pole in windy weather, exactly like you’re attach the Carbon Reflex 1 footprint if you were using the fast and light footprint setup instead. Continue by inserting the pole ends into the center body grommets on the tent body floor and stake out the rain fly corners. Next attach the tent body clips to the pole, above the velcro tabs, to hold the ends of the tent body up and create the bathtub floor sidewalls. The setup will look like this.

The resulting structure is somewhat cooler and better ventilated than using the regular inner tent because there’s no mesh. However, the “stand-up-ed-ness” of the tent body end walls is totally dependent on the velcro tabs inside fly and not on the hubbed Y pole architecture used by MSR’s other tents. It’s a much less resilient architecture because the velcro tabs are not nearly as strong as tent pole hubs.
How much of a weight savings is there? On the Carbon Reflex 1, the weight savings of using the meshless tent body over a the regular inner tent is 2.6 ounces and costs $100, which I consider kind of expensive. The weight difference between a lighter weight footprint only-setup (no inner tent) and the tent body is 2.4 ounces.
Net Net, I’d give the Carbon Reflex 1 Tent Body a pass because it only provides a 2.6 ounce gear weight reduction over the regular tent. Carrying an additional 2.6 ounces isn’t going to slow you down very much on a backpacking trip and is easily compensated for by trimming other less expensive sources of gear or food weight. MSR’s new tent bodies probably provide a much larger weight reduction for their two-person and three-person variants, but it’s hard to know since MSR has done such a poor job at documenting the weight differences.
Note to MSR: Please publish a table showing the minimal trail weight for each tent, the weight of the regular inner tent, the weight of tent body, and the weight of the fast and light foot print for each model of tent for which the tent body is an option.

Evaluation of the Tent Body Concept
While the tent body concept is attractive in theory, it’s really just an inner tent without any bug mesh and something you’ll probably use infrequently. A much better solution would be to replace the Carbon Reflex’s inner tent altogether and sell the tent with an inner tent that has removable mesh panels. This kind of option is available in the modular four season backpacking hammocks hammocks made by Dream Hammock, Warbonnet, and DutchWare. If you don’t need the mesh, you simply remove it. This kind of enhanced inner tent would be easier to sell to consumers, easier to explain, differentiate MSR’s tents from competitors, and provide more value in your purchase. That’s my 2 cents.
SectionHiker is reader-supported. We only make money if you purchase a product through our affiliate links. Help us continue to test and write unsponsored and independent gear reviews, beginner FAQs, and free hiking guides.MSR provided a tent and tent body for this evaluation. Published 2018.
 SectionHiker.com Backpacking Gear Reviews and FAQs
The lack of mesh makes this not very useful for me. I usually want to be protected from bugs when I’m sleeping!
I suppose some people would have a use for this tent but i always need mesh for bug protection and breathability
This would create some difficulties if setting up in heavy rain. The bathtub floor goes first, then the rain fly. In the meantime, the floor becomes a real bathtub! The general idea of fast ‘n light is to pitch the rain fly first to keep your inner tent dry, then hang the interior. This goes in reverse.
I picked up 2 of these for my freelight 1 and 2. Once mosquito season is done , it’s all I use . I prefer them. I end up with more head and elbow room, and I like the protection of the raised ends. As far as the foot end sagging down the single pole, I tie a cord to it and rap the cord up the pole barbershop fashion, then tie it off at the spreader bar. The sides of the bathtub on the 2 tend to sag, but at least the vestibules are big. On the 1, the bathtub sides are higher and stay up. The backside is about 12 inches high to handle splashback from the small rear vestibule. The weight savings isn’t big, but I’ll take every little bit.