Winter camping and backpacking is a ton of fun, but you do need to learn some new skills to do it safely and comfortably. That was our focus on a winter backpacking instruction trip that I helped co-lead this past weekend.
We had 10 people on this trip including two winter leaders and five winter co-leaders, making for a very favorable instructor-to-student ratio! Each student was paired with one or two more experienced winter backpackers who mentored them over the weekend. I was paired up with a hiker named Roger who I knew from earlier in the winter. He had never winter camped before, so I lent him some gear and helped show him the ropes, from pitching a winter tent to melting snow.
Teaching Winter Camping and Backpacking
While you can try to teach people about winter hiking and camping in a classroom format, you also need to take them out on a trip with experienced winter backpackers so they can see firsthand what gear they use and how they stay comfortable on hikes and in camp. I learned the basics of what I know about winter backpacking this way and built on top of that foundation.
Backpack Weight
We started this trip at the AMC Highland Center in Crawford Notch where we checked everyone’s pack to make sure they had the right equipment with them. This can be pretty hit or miss with beginners who aren’t sure about what gear to buy or bring and may not be reading the gear lists you email them as literally as you think. There’s also the fact that beginners have often never done a practice run with their new gear before the hike and can’t comprehend how heavy it is.
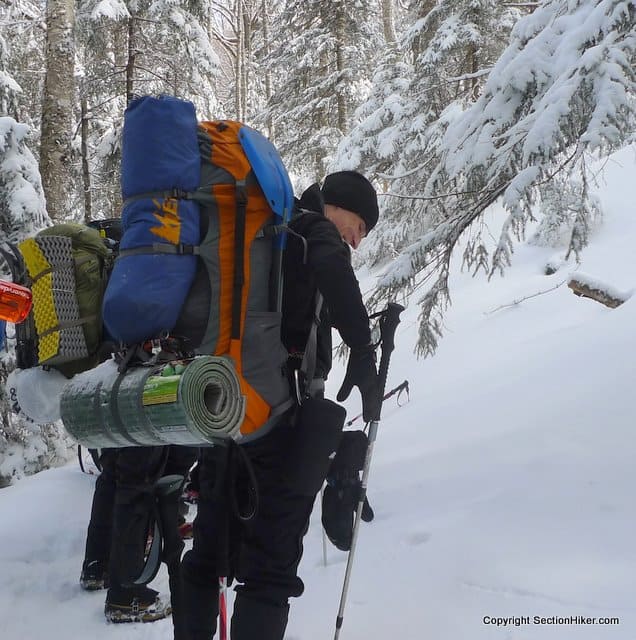
After making sure everyone had enough insulation and shelter to survive the night, we weighed everyone’s pack. This is useful, if only to demonstrate the range of weights possible. Most of the people on this trip had loads ranging from the mid 40’s (pounds) to mid-50’s in weight, although 2 of the participants had gotten their total gear weight down to close to 40 pounds (Yea, I was one of them at 41 pounds, including fuel, food, and water.)
Gear weight isn’t everything, of course, but it can make a huge difference in how much you enjoy a trip and it’s something to be doubly vigilant about in winter.
Hiking Distance/Pace
The distance to the Naumann campsite where we planned to spend the evening – just below Mt Pierce – is 3.1 miles from the Highland Center with about 2,700 feet of elevation gain. That’s not a huge distance for a winter backpacking trip (6-8 is probably the norm), but it is a respectable climb if you’re humping 50+ pounds of gear and supplies up a snow-covered trail.
We did this distance in under 3 hours, taking lots of water and food breaks along the way. The more experienced hikers also set the pace, which was moderately slow, or what you’d expect on a climb like this, especially with heavy packs.

Campsite Setup
When you reach your destination in winter, the first thing you want to do is to find a good campsite and prepare the area where you plan to pitch your tent. This includes stomping the snow flat so it can harden, a process called sintering. After preparing Roger’s site, I chose another site nearby and we started to stomp it flat, only to discover voids in the area I’d chosen.
It turns out we were standing on a crust of snow on top of some bushes. This kind of site is very bad to sleep on because you can fall into the void at night and become injured or be unable to get out. We abandoned it and I found another site to pitch my tent.
After pitching both tents, my friend Kelly and I dug a snow kitchen for everyone to share for cooking and melting snow together.

Melting Snow
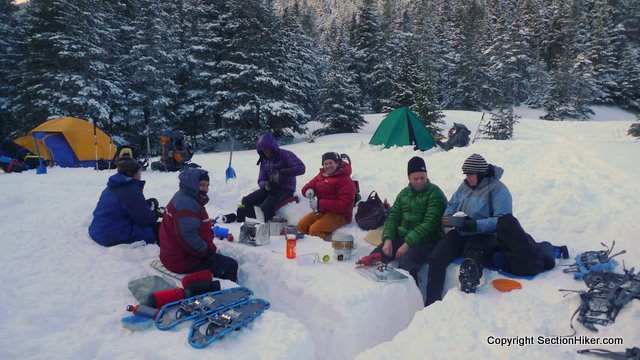
In winter, you spend most of your awake time in camp melting snow for drinking water, cooking, or eating. If you’re in a group, all social and cooking activities are generally centered around a camp kitchen, which you dig into the snow using avalanche shovels. The kitchen that Kelly and I dug was big enough to fit 10 people, who sat facing each other around a big slab of snow. This was surrounded by a trench where people could put their feet when they were sitting (top photo.) People put their stoves on the center slab and sit on insulated pads that they’ve brought along for this purpose.
If there’s one thing that defines the difference between 3 season backpacking and winter backpacking, it’s the need to melt snow at night to refill your water bottles.
It’s important to save a small amount of water during the day – two fingers or so – to use as a starter in your pot when melting snow. If you try to melt snow without the water, you can burn a hole in the bottom of your pot.
If by late afternoon, you have more than a liter of unfrozen water left in your bottles, it’s best reboil it on your stove and pour it back into insulated water bottles for the night. If not, pour the remaining water you do have into a pot, heat it up, and start adding chunks of clean snow to it. Let it boil so that it’s as hot as possible, and then pour it into an insulated water bottle. If you’re chilled, use the boiling water to make dinner and drinks for yourself, and then return to the task of melting snow for drinking water.

Melting snow takes longer than boiling water in its liquid form, so I like to melt 3 liters of water at night: one to drink at night, one to drink before breakfast to pre-hydrate for the day, and 1/2 liter to re-hydrate my breakfast. I use the remaining 1/2 liter as a starter to melt new snow, boiling 2 liters, which I carry during the day in insulated bottles.
Roger and I shared a stove on this trip and we’d brought two bottles of white gas with us (32 ounces) to see us through melting about 12 liters of snow to water and cooking two dinners and two breakfasts. We ended up with about 4 ounces of extra fuel at the end of the trip, to give you an idea of how much fuel we burned for just one night out.
The Big Sleep
After dinner, almost everyone went to bed even though it wasn’t even 8 pm yet if only to warm up in their sleeping bags and get out of the cold. Temperatures were forecast to go down to a balmy 5 degrees that night, which isn’t too bad for this location which can get far colder.
Going to sleep so early is normal for a winter backpacking trip, where it’s not unusual for a winter camper to sleep 10+ hours at night, snuggled up in a -25 sleeping bag. After a crazy work week, sleeping from 8 pm to 6 am is blissful and one of my favorite things about winter camping. Nothing much happens during these 10 hours other than a lot of snoring and loud cursing when people post-hole in their PJs on trips out of their tent to pee.
Melting Snow, Again
The next morning, everyone got up by 6:30 am, got dressed, and started boiling water and melting snow again. When you wake up in the morning in winter, you’re usually dehydrated by at least a liter unless you’ve been consciously sipping throughout the night. Even then it’s good to camel up at breakfast. After breakfast, everyone with a stove kept making more water, in order to use up their remaining gas and make sure everyone was re-hydrated after their long sleep.

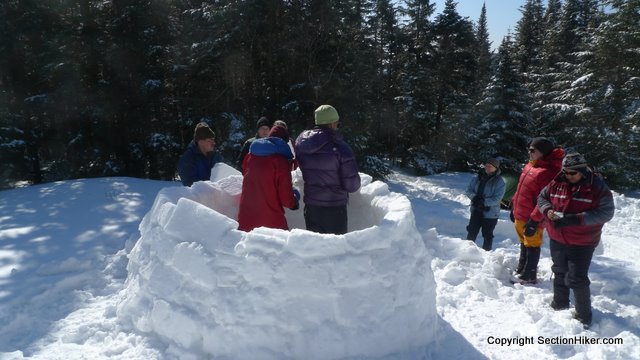
We had beautiful weather on Sunday with temperatures reaching into the low 50’s by mid-day. Rather than hike out immediately, we worked on building an igloo, sawing snow and ice blocks out of a quarry, the old-fashioned way. We didn’t finish the structure but we made surprisingly good progress as a team and it was fun playing in the snow.
By noon, however, it was time to go, so we packed up and headed down the mountain at a fast clip and with somewhat lighter packs.
This was great trip and a great group. No big peaks, but I had a lot of fun anyway.
Next weekend is the last “official” weekend of winter peakbagging before the end of winter and I’ll be back on the hills again.
 SectionHiker.com Backpacking Gear Reviews and FAQs
14 oz of fuel for cooking and snow melting for one night per person – WOW, eye opening. That’s nearly 4 weeks of spring hiking fuel usage for me.
Yea – you need lots of gas. I reckon a heat exchanger would save me about 40-50% on fuel consumption, but it’s probably not worth it on short trips like this.
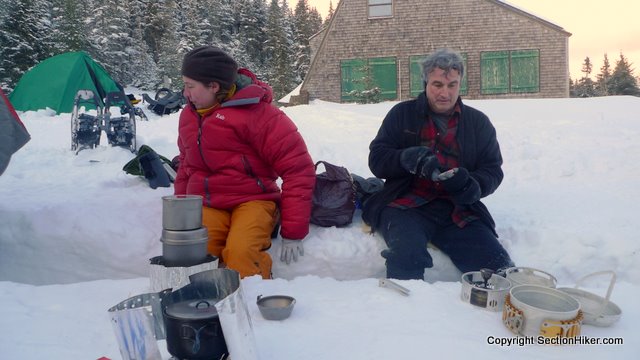
Is that a Svea 123 in a Sigg Tourist cookset in the “Stove Setups” picture? A real blast from the past that brings back good memories…
I believe so. The owner said it was a Svea. Quite a cool stove, windscreen, and pot combination.
Philip- I really enjoyed reading this one, winter camping like this is completely off my chart with zero experience and something I would not attempt without going with an experienced winter backpacker. HAH! I’m not even sure I could shoulder a 40-50 pound pack, much less hike with it…in snow…up hill…in the cold. :-)
It’s a shocking transition in the late autumn when I switch from a lightweight pack to my winter pack. There’s also the fact that we carry the same stuff, minus about 5 pounds far day hikes in the winter mountains. Wouldn’t you know, I’m finally in shape and winter is almost over!
As a single mom through the week with children ages 11, 7, and 5, I am looking forward to starting winter camping. I haven’t bought the first thing that we need but will start tomorrow. Temperatures typically range around 15 to 30 degrees in the places we intend to camp. We are just starting out and I would just like to start with the basics (keeping warm). This article has been extremely helpful. But I am hoping we will be ready to go the first time instead of packing up and going home in the middle of the night. Thanks so much for the information you have already provided.
Wow that really is a lot of weight to carry for an overnight in the winter, I can’t believe how much fuel you use to melt snow! I’ve never done an overnight backpacking trip in the winter, only day hikes in winter so I never have to carry a shelter, fuel, or a sleeping bag. I definitely want to try it though come next winter. We hardly got any snow up here this winter in WI, it was unseasonably mild. Back to 3 season again and it’s only March yet!
You can save a lot of fuel if you can find an open running stream or creek instead of snow.
But the advantage of winter backpacking is that you can camp anywhere because there is snow everywhere.
When Philip’s father did that hike, it was uphill both ways.
Man did Pennsylvania miss winter this winter. And I find it hard to believe you can melt thru a snow filled aluminum pot without a little water in the bottom unless you’re using a cutting torch; leave the old wives tales to the old wives. And use titanium anyway.
Yes a heat exchanger is neccesary as well as always using a lid on your pot. I’m glad that you mentioned starter water while I’ve never seen holes burned in pots it does take forever to melt snow without it.
Hi Philip!
I’m new to winter camping and I’m wondering what to do when I need to poop in tha backcountry in winter when the ground is frozen or buried under ice/snow, making digging a cathole a challenge if not impossible. Would you recommend packing out your poop in those circumstances? If so, are there any products/techniques you could recommend? Perhaps you’ve written on this subject. If so, would you direct me to your post? Thanks as always for the help!
Poop on the snow. Then use a stick to push your poop into a plastic bag. Whether or not you carry out your poop is really up to you. I would consider how frequently the area is used.