The Seek Outside Silex is a two-peak/two vestibule tarp shelter with an optional inner tent (nest) for bug and condensation protection. It offers an innovative and durable zipperless design for its two doors and vestibules. It’s roomy for one, fits two adults and their gear if not using the nest, and can be ordered with a stove jack to run it as a single-person hot tent. A Dyneema Composite Version of the Silex (Ultralight) is also available. The Silex is crafted and constructed in Grand Junction, Colorado, USA.
Seek Outside Silex
Comfort
Ease of Setup
Weather Resistance
Durabilty
Weight
Packed Size
Innovative Zipperless Tent
The Silex solves some pain points associated with zippers in ultralight tents - zippers leak, zippers are heavy, and zippers wear out. Ditching the zipper improves performance in all these areas. The Silex fills the niche of backpacking tarp, tarp tent, trekking pole tent, and lightweight hunting tent.
Specs at a Glance
- Type: Trekking pole tarp with two peaks
- Inner Tent (Nest): Optional
- Average Weights:
- Canopy – 17 oz / 1 lb 1 oz
- Canopy, stakes, stuff sacks, & cordage – 21 oz / 1 lb 5 oz
- Nest – 16 oz
- Trail weight
- Silex Tarp: 21.1 ounces (seam-sealed canopy with cordage); 0.6 ounces for stuff sack
- Nest: 17.0 ounces plus 0.6 ounces for stuff sack
- Dimensions:
- Height – 50″
- 7′ W X 7′ L, slight diamond shape – one diagonal is 6″ shorter than the other. (49 sq ft)
- Head to foot length is 112 inches, width is 46 inches (actual, measured)
- Materials
- 30D Cordura spec ripstop double-coated silnylon. Sage green has a bit of PU mixed into the coating to improve performance in sandy areas.
- Hydrostatic head rating 3000-4000 mm.
For complete specs visit the Silex product page at Seek Outside
Different materials and colors
I tested the sage green silnylon version; other silnylon color options are brown and olive green. The brown and olive green Silexes are pure silnylon; the sage green version is primarily silicone-coated with a little polyurethane (PU) mixed in, which lowers the stickiness of the fabric and is tailored for sandy locales. A Dyneema Composite Fabric version, the Silex Ultralight, is available at a claimed weight of 12 ounces for canopy and cordage, which, if accurate, is a significant weight savings of just over 9 ounces from my silnylon/PU version with cordage after seam sealing.
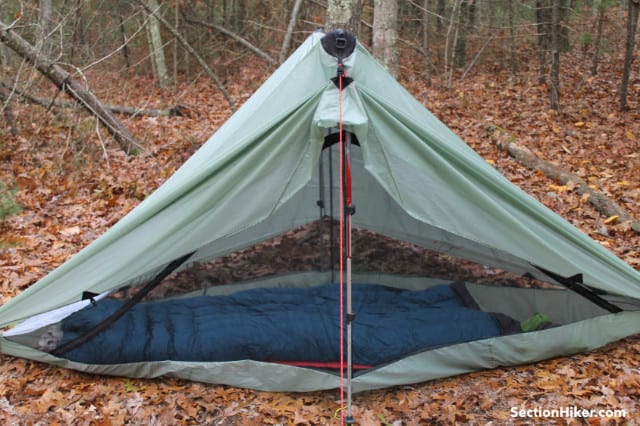
Zipperless doors
The most unique feature of the Silex is its double zipperless doors. Pyramid shelters, whether one or two-pole designs, often have a zippered door that is under tremendous tension when the shelter is pitched tight. To take some of that tension off the zipper, you often see a buckle or a snap at the bottom of the zipper, or guylines from each of the zipper sides. If you don’t use the tension relievers, the zipper can split. Additionally, zippers can leak and they can wear out.

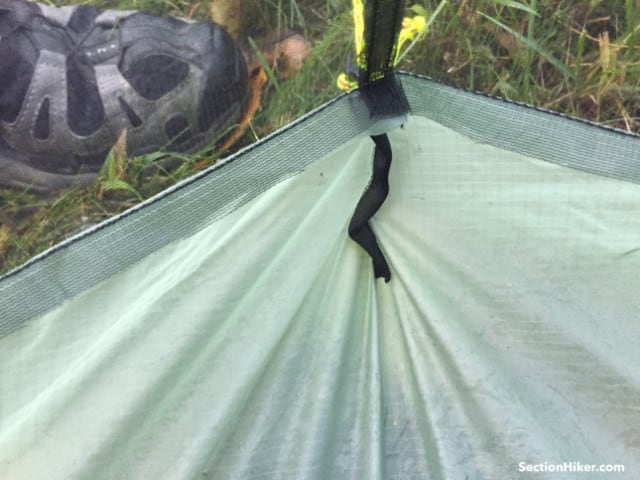
Seek Outside decided to eliminate the zipper failure point entirely, with vestibules/doors on either side of the user that each have their own dedicated ridgeline. Each ridgeline feeds through three plastic rings on which two LineLoc tensioners (for strength and redundancy) slide up and down and can rest (lock) at any point. The vestibules come fully down to the ground to seal out the weather but can slide up to a height of approximately 40 inches (when pitched with trekking poles set to 130 cm) to serve as the entry doors, or anywhere in between for ventilation. The tent fabric is folded accordion-style when open, but still at a steep angle, so rain runs down the channels to the ground, instead of getting caught in the folds.
How is the Silex door field-repairable? If both LineLocs break, you can tie a tension hitch to replace them. If one of the door rings breaks, it can be replaced with a split ring (like a key ring) or a loop of knotted cord. As a tinkerer and MYOGer in a society of planned obsolescence, I appreciate that Seek Outside is thinking this way, empowering its customers to fix things themselves and keep the gear usable in the field, instead of shipping them back or throwing them away.
If one or both of your trekking poles break, you can run a ridgeline from the D-rings on top of the peak cones to a couple of trees. And, if it happens when you’re hiking in a place with no trees, check out our article on Trekking Pole Tent Reliability and Risks. The comments section has a lot of great examples of how people have improvised or repaired poles in the field.

How well do the zipperless doors work? Getting in and out of the Silex through the zipperless doors is incredibly fast and easy. Push up, enter, pull down behind you. No need to unstake a door. No need to remember to clip a buckle before closing the zipper. The doors are far enough away from the nest that the stuff you have inside the nest won’t get wet. They also feel more robust and sturdy than zippered doors. I really think this is a revolutionary design for tent entrances.
Trekking pole pitch
The Silex has heavily reinforced peak cones (inside and outside the canopy fabric) to be pitched with trekking poles. I prefer to pitch handles-up; it keeps the handles out of the dirt and cleaner and it keeps them away from rodents who want to chew them to get the salt from your sweat. I usually only pitch a shelter with the tips up when it can’t be pitched the other way, for example, when the shelter is constructed with grommets that tips fit into firmly, but handles don’t. There are no grommets to accept pole tips in the reinforcement cones of the Silex, but rather loops of shock cord with cord locks to tighten around the poles.
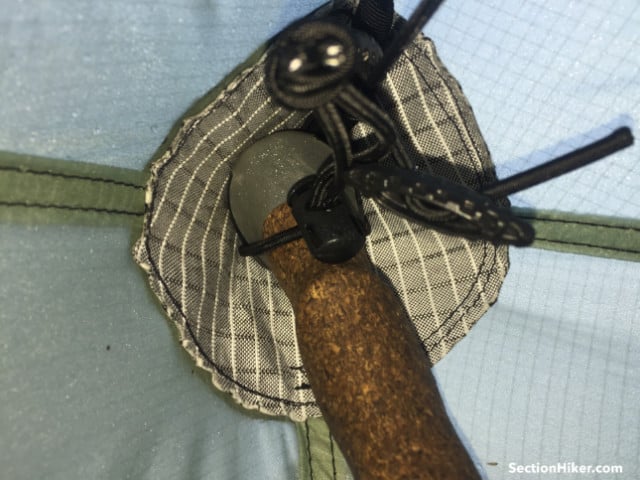
Seek Outside states that the reinforcement is durable enough for a trekking pole-up pitch, and on their Eolus (their two-person zipperless two-pole tent) setup video they do exactly that. On their Silex setup video, they pitch tips-up, but the tips are covered with rubber tip covers. If you decide you want to pitch your shelter tips up, I think using the rubber tip covers is the safest way—you can toss them in your stake bag to have them at the ready for pitching. Even if the reinforcement fabric is durable enough for uncovered tips, I think it is too much of a risk to pitch your tarp with sharp tips so close to the tarp’s lightweight fabric. One slip during the pitching process and you could punch a hole. On soft ground, I found that using pole tip covers even when pitching handles up was helpful with the Silex to avoid the pole tips sinking and slackening the geometry of the pitch.
Included stakes
Seek Outside has included 4 sturdy red aluminum Y stakes and 2 thin aluminum shepherd’s hook stakes which are probably best used to stake out the inner nest if you’re not guying it out to your trekking poles. For intense storms, a few more Y stakes would likely be best for the additional tie-outs.
Pitching the Tarp
I like to stow the Silex from the middle first, with the two triple-seam (non-door) tie-outs packed last. When pitching, I keep the majority of the tarp in the bag and stake out the first point, then I grab the second tie-out and let the rest of the tarp out slowly. This helps avoid the tarp taking off like a kite in high winds.
Setup of the Silex is very simple: stake out the four corners, insert the trekking poles, and tension the LineLocs. However, there are some subtle nuances to tensioning it properly that are not intuitive. The pitching videos on Seek Outside’s product pages are quite helpful. I also read a number of forums online where users asked the company for pitching assistance, and found a couple of helpful tips for tightening up the slack between the two peaks: tensioning the top seam by adjusting the LineLocs at the tops of the doors, and staking out the triple seams longer and the door seams shorter.
Pitching the Nest
The nest’s ceiling connects to the peak cones inside the tarp. This connection point is separate from the trekking pole keepers also found in the cones. On the model I tested, there is a sewn grosgrain channel that the nest toggle feeds through, but it is a very tight fit–I had to take off my glove liners to do it. Later I realized I could take the toggles off, thread the cord through easily, and put the toggles back on.
The Seek Outside setup video shows the toggles going through plastic rings, which would be a much quicker and easier system, and hopefully is the current setup. I will likely modify mine with a small cord or grosgrain loop to approximate the ring, so I don’t risk losing the toggles by taking them off, which I almost did when I dropped one into the leaves as it was getting dark.
There are additional, permanently-affixed toggles halfway down the head and feet ends that easily slip into grosgrain loops on the interior of the Silex canopy and hold the nest close to the sidewalls of the tent. The head and foot end nest guylines attach to the Silex guyline stake loops, and the side guylines can either go around the trekking poles or be staked out independently.
The four main stake points at the corners have LineLocs on them to quickly adjust the tension, and there are 2 LineLocs attached per vestibule for extra guy outs, for which you have to supply your own line. The three-panel seams (non-door sides) each have 2 grosgrain webbing loops for mid-panel tie-outs. There are also plastic D-rings on top of each peak cone, from which you can tie additional guylines for extra stability or rig up a ridgeline between two trees to run the Silex without trekking poles.
You can pitch the Silex canopy first, followed by the inner; pitch the inner alone; or keep the inner attached to the canopy like a double-wall tent.
Packability
The Silex and its nest come in identical stuff sacks. Can the Silex be packed into one stuff sack when the inner is left connected? Just barely! It’s a very tight fit that takes effort. It would be great if the inner tent came in a slightly larger stuff sack that could hold the two pieces since most of the time you bring the nest you’ll want the canopy packed too, even if some nights you pitch the nest alone.
Footprint/Coverage Area
The Silex is a 7’x7’ square which is a sizable footprint. This is great for protecting lots of gear but I was worried about using it in a heavily forested environment where, unless you’re at an established campsite, it’s hard to find this much open area. I’m usually hiking in the dense forests of New England, not the wide-open West from whence Seek Outside hails. However, you really only need to find the space for the nest—the canopy itself can be pitched over rocks, roots or small brush, within reason, of course. It’ll just reduce the space in your vestibules.
The Silex is sold as a “1.5 person tent,” which translates to one person plus gear in the nest, 2 people plus gear with just the canopy. When sleeping two under the canopy, note that the doors need to be down, at least most of the way, for both people to have full rain protection. Two people could also each use their own bivy under the canopy for bug protection.
Nest Details
The nest is made of three materials: a silnylon bathtub floor, noseeum mesh sides with zippered doors, and a breathable nylon top with Durable Water Repellent (DWR). The nylon top is white which keeps the interior bright, and serves as a partial liner for the tent canopy to keep condensation off your sleeping bag, functioning as a double-walled tent. It works well in this capacity. I first used the Silex on a night in the high 30s with 96% humidity. I had no drips on me that I could tell; the canopy was soaked as if it had rained, and the nest roof was damp, but primarily on the outside. The foot of my sleeping bag was only very slightly damp.

The nest is an elongated diamond shape that creates small triangular spaces at the head and foot of your pad as well as on your left and right sides. You’ll want to keep most gear outside of the nest under the vestibules, but it’s good to have a little extra space for things you might need in the night, like water, an extra layer, and a headlamp.
Wondering if the size will work for you? Cut strips of tape or string to the dimensions listed under the Specs at a Glance and put them on the floor, then put your sleeping bag and pad inside and lay down.

The last time I used the Silex, it rained overnight, but I wanted to test it as if I were pulling into camp in a storm or in intense bug pressure and needed to inflate my pad with an inflation bag from inside the nest. You can do it! While sitting up inside the nest, I lay my pad over my legs like a quilt, with the valve in my lap, and had enough headroom to fill the inflation bag with air and then squeeze it into the pad.
Seek Outside claims the nest is able to fit a 25 inch wide by 78-inch long by 3-inch thick pad. I can confirm that my 26-inch wide (tapering down to 20 inches below the torso), 3.35 inch thick pad fit without a problem.
The nest is not a zipperless design—there are two zippered doors so you have the flexibility of accessing gear in either vestibule. It also provides some redundancy—if one of the zippers fails, you can stitch it closed and use the other door, and still have full bug protection. There are four zipper sliders on each door, so you can just reach a hand into the vestibule to grab something or open the whole thing up for entry and exit. Four zipper sliders also provide redundancy in case of a slider failure. I plan on adding a small piece of reflective or brightly colored cord to at least a couple of the sliders, to make it easier to find them quickly. Black mini zipper pulls on a black zipper currently make them difficult to locate at night.
Most of the stitching on the canopy is really robust, so I was surprised to see the nest sewn with a single row of stitching connecting the mesh to the silnylon floor, with the edges of both left raw (unfinished). It’s important for this seam to be reinforced because it’s under tension between the weight of your body and the attachment to the tent at the peaks. This seems uncharacteristic for Seek Outside’s focus on durability and attention to detail and I’m hoping I just got an early production model.
Seam Sealing
The standard option for ordering a tent from Seek Outside is that it comes to you unsealed, with a tube of Seam Grip +Sil (formerly known as SilNet) for you to seal it yourself. Make sure you realize this and factor into your order the time you’ll need to seal it. You can choose the option for the company to seal it for you, but it’s expensive and adds an additional wait time to your order.
Instead of using the SilNet straight from the tube, or trying to thin it with mineral spirits, I used Permatex Flowable Silicone Sealant from an auto parts store, meant for windshields. This is a thinner silicone that is easier to spread neatly and that adds less weight to the finished shelter.

I made a pinhole in the tube and squeezed lightly as I held the opening perpendicular to the seam and touching the fabric. In this way, the nozzle of the tube spreads the sealant across the seam evenly. Then I just ran a finger down the seam to work the sealant into the stitching. No glops, no drips, no mess. To practice this technique, try it with a tube of toothpaste against the palm of your hand, squeezing just slightly, and you’ll leave behind a film the width of the tube. If you’ve used a thin coat, Permatex cures in about an hour, enough to not spread further, and is fully set in 24 hours.
Getting to Know Your Gear
It is good practice to always spend some time familiarizing yourself with your shelter before taking it into the field, but I know we don’t always do that. We’re excited about a new piece of gear that comes in the mail a day or so before a trip, and we want to use it right away. It is important to do the at-home setup with the Silex, though. Apart from the seam sealing, the nest guylines are not attached. While they are pre-cut, you have to thread them through the LineLocs and knot them yourself. The lines fit very tightly in the LineLocs, which is good for holding tension, but not something you want to do with cold fingers by the light of a headlamp. Additionally, it took me a little playing to get the nest properly oriented, the poles to the right height, and the tarp tensioners adjusted so the shelter was tight. Once you get it, though, you’ve got it, and setup is quick and easy.
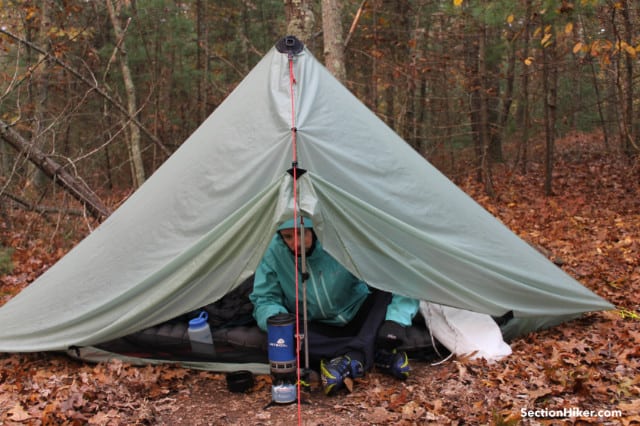
Performance in Wind and Rain
When the Silex was first released, I noticed lots of questions online about how well it manages condensation since it doesn’t have a peak vent like many pyramid tarps on the market. The question of tent condensation is a complicated one that doesn’t have a quick answer. One person, single apex pyramids often have peak vents because you cannot leave their door open without getting your gear wet. With the Silex, you can put your gear in one vestibule, and use the other one as a door, keeping it partially to fully open as a massive vent. Even fully open, the door acts like an awning or beak, shielding from rain. If you raise your poles to 140 cm, you can get ventilation from around the perimeter of the tarp, or lower them to 120 or 125 to pitch it flush to the ground to batten down the hatches. The extra door fabric, folded like an accordion when open, will flap in the wind, but the structural integrity of the tent is not affected by this.
Secondly, the nest is designed to prevent condensation drips in addition to protecting from bugs. The ceiling of the nest is a breathable nylon treated with DWR which acts as a tent liner, making the Silex into a double-walled tent. Even when you don’t need the bug protection, if the conditions are right for condensation you may want to use the inner. I was pleased with how well the nest worked in this regard.

Finally, your choice of location for the pitch can make a big difference in the amount of condensation you experience. For more on this and how to manage it, check out our article on How to Prevent Tent Condensation.
It’s important in windy and rainy conditions that the Silex be pitched taut, and as described above, this takes some practice, but it is well worth it to experiment with the interplay of the LineLoc tensioners on the four corners and below the peak cones, as well as the height of the poles, to perfect your pitch before taking it out.
Performance in the Heat
On hot nights, pitch the Silex higher (140 cm) for ventilation around the perimeter. Keep both doors fully open for maximum airflow, knowing that you can quickly close them from inside the tent if it starts to rain.
Personal Touch
This is standard with all Seek Outside gear, but there is a tag inside with the handwritten name of the person who sewed that piece of gear for you. Even as Seek Outside grows, this is a really nice cottage company touch that personalizes the equipment and makes it feel like a relationship. My Silex canopy had this tag, but the nest did not.
Recommendation
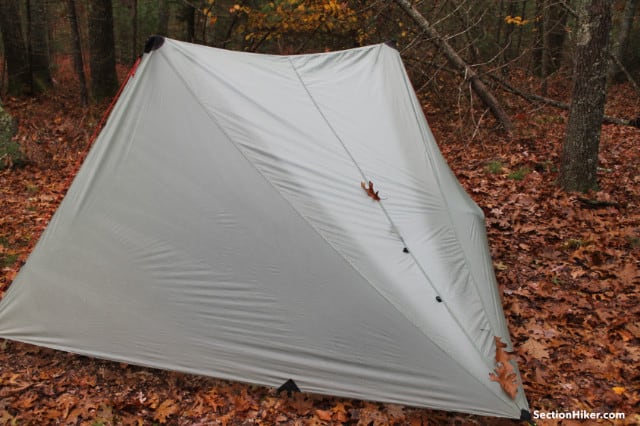
The Seek Outside Silex (silnylon version) is a lightweight, durable, innovative and dependable shelter that prioritizes durability, field-repairability, and coverage. I love the zipperless doors for both ease of use and ruggedness. The nest’s diamond shape is smartly designed for keeping small essentials close and providing the benefits of both bug protection and condensation protection by way of a partial fabric tent liner. With the change to the finishing stitching noted above under Room for Improvement, the nest would match the quality of the canopy. More extreme gram counters who are willing to pay significantly more for a substantial drop in weight may want to look at the Silex Ultralight in DCF.
Likes:
- Thoughtfulness of durable and user-repairable design
- Fast, easy to use zipperless doors
- Great weather resistance
- DWR fabric ceiling on inner nest works like a tent liner to manage condensation.
Room for improvement:
- Improve the finishing of the inner nest: use a double row of stitching and capture the fabric edges
- Bigger stuff sack to pack the Silex and nest together
- Include more detailed pitching instructions with helpful pitching and tensioning tips
About the author
Disclosure: Seek Outside provided SectionHiker with a Silex and nest for this review.
SectionHiker is reader-supported. We only make money if you purchase a product through our affiliate links. Help us continue to test and write unsponsored and independent gear reviews, beginner FAQs, and free hiking guides. SectionHiker.com Backpacking Gear Reviews and FAQs


Nice review! Nice tent!
Great review, very thorough. Boy, there are so many choices now for light, 1-/1.5-/2-person tents. Sorting through the options takes some work.
This looks like an interesting tent. The sliding fly door closure looks like a good idea.
I’m just .5 inch over six feet, and an ongoing concern is the length of the space so the tent fabric isn’t almost on my face, or the sleeping bag isn’t brushing on the fabric at the foot end.
Many tents, even those claiming to accommodate taller folks, still have very small clearances, like two or three inches. If you’re on a slightly sloping site, and move a little during the night, you end up sliding up or down a bit, and you’re up against the fabric at one end or the other.
The dimensions given are confusing. It says both that it’s 7 ft. x 7 ft. and also 112 inches long.
What is the actual length of the interior floor?
Sorry, Nick, for the confusion. For clarity, the 7’x7’ dimension is the tarp, and the measurement of 112” long x 46” wide is the nest floor. Those dimensions are actually a little confusing too because the nest is an elongated diamond, with each of the 4 sides measuring approximately 58 inches. So it’s 46 at its widest point only, from side corner to side corner. The nest stands 44 inches tall at its midpoint, tapering down to the head and feet ends, and is oriented at a diagonal under the tarp, so that the two zipperless doors of the tarp match up with the zippered doors of the nest. Hope that’s helpful. Please let me know if I can clarify anything else.
Hi, Greg. Thanks for the reply! So, it does appear the interior length is fairly generous, compared to similar tents. The other factor, which is a little hard to gauge from the photos, is how much the angle of the tent walls figures in. The angle at the head and foot ends does seem rather low, which would effectively reduce the usable length. I suppose the only way to know for sure is to actually get in the tent with a pad and sleeping bag.
Nick, I think a benefit of the “gear triangles” at the head and foot ends is that they utilize otherwise wasted space. By the time the nest taper becomes wide enough to fit a sleeping pad, you’re set back from the tent walls. I’ll try to get some measurements of the head/ foot clearance.
I think the usable space problem that Nick has zero’d in is common with many mid-style shelters, in that you are staring straight into the ceiling when you lie down because the ends are so low. You could fix this by putting struts at the ends to raise them, but Tarptent has a patent on it (pitchlocks) which I suspect is one reason why so many companies don’t provide them.
https://sectionhiker.com/the-problem-with-pyramid-shelters/
Tarptent has a patent, of dubious value, on triangular supports in corners. The patent itself refers to the Hilleberg Akto which uses two short pole head and foot end risers. The US PTO issues many patents that are of little value other than to allow litigious patent holders a financial weapon to stifle competitors. It has nothing to do with innovation and everything to do with litigation. Any tent manufacture could use the Akto design which is not patented and have a better, wider raised end than a “Pitchlock” triangle. Just sayin….
Another reason for getting a patent is marketing. About forty years ago, a customer of mine patented a process for repainting cars. Although his method became obsolete, it still helped his body and paint business that he had a “patented process” that he could use. He told me his entire reason for the patent was to get a leg up on advertising.
Strictly for marketing purposes, I was close to pursuing a patent on a construction process I’d developed in my sign business. Instead, I shared it at Letterhead meet, a gathering of other like minded sign gurus. I’d learned so much from the other Letterheads that I wasn’t about to keep those ideas to myself. I later saw signs in other parts of the country built with the same technique.
To be clear (i hope), i was referring to the distance to the inner tent (“nest” in this case) ceiling or inner wall above my head and/or feet, not the side-to-side distance. The lower (farther from vertical) the wall angles are, the less usable the floor length becomes, as you’d either have the wall fabric rubbing on your head/face and/ the foot end of the sleeping bag.
As a general observation, it seems like tent makers often overstate how well certain tents accommodate taller users when it comes to this issue.
Manufacturers Note:
We feel a person 7 ft tall can sleep on a 3 inch pad fine in it. The tent is 126″ stake to stake on that angle, the inner is 112″ . A 6’6″ person is 78″ . The inner has a toggle to attach to the outer, pulling it out some.
As a note, regarding the Gross Grain finish on the nest, the omission was to save weight and nothing else. We do not feel that is a problem area with our fabrics, however in some other inners we do finish it because we do feel it is an issue with the fabrics.
Excellent review. I love the “outside the box” thinking that the doors represent.
I’m a hammock camper, but reading reviews of awesome tents makes me long for a tent, too. ;-)
Looks remarkably floppy.
Much rather have the SS1 from Tarptent. Frankly appears to be superior in every way.
I’m tall (6’7”) and have concerns about being too tall for the length of the nest. The Silex checks all of the boxes for what I’m looking for, but I have concerns about being 6’7” and having enough room to not be right up against the mesh of the nest. I have a 25”x78” (4” thick) sleeping pad (Sea to Summit) which already loses some of the height I assume I would need to stay clear from the interior of the nest.
Would love to hear your thoughts on whether this works for us taller guys.
Hi William, check out Kevin’s (one of the owners of Seek Outside) comment above about the nest being sized for someone up to 7 feet. If you contact them, they may have photos of tall folks in the nest. I’m over a foot shorter than you, but in the photos in the article you can see that my 3.35 inch thick pad is positioned as far up to the head end of the nest as it will go, and since the nest is diamond shape there’s a triangular space at your head and feet, which means the nest gets some height before it gets to where your head is.
I think I still prefer my similar Tarptent Notch Li with “solid” inner tent. It has lower ventilating at each strut-supported triangular end and at the top with two vents WHEN CLOSED UP FOR A STORM.
In clear, calm and warmer weather I can open both doors as well if desired.