Here are 10 MORE winter hiking and backpacking hacks, tips, and tricks that you can try the next time you get out in winter conditions to see if they work for you. If you missed the first set of 10 Winter Hiking and Backpacking Hacks, be sure to read them also.
1. Bring boil-in-a-bag frozen dinners on overnight trips.
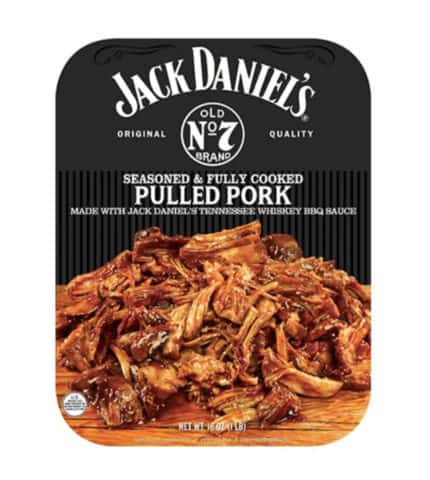
Store-bought or made at home, bring frozen boil-in-a-bag meals on winter trips so you can eat real food instead of freeze-dried mush. To heat them up, just throw them in the same pot that you’re using to melt snow for drinking water. You don’t have to worry about refrigeration in winter, so you can bring foods that wouldn’t normally carry the rest of the year. For example, pulled pork, beef stew, Fettuccine Alfredo…the richer, the better.

2. Wear oven-roasting bags on your feet to keep your socks and boots dry.
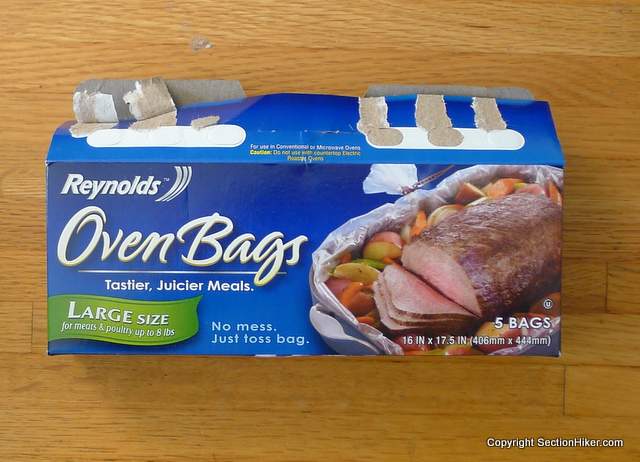
Your feet sweat about a 1/2 cup a day of perspiration when you hike. This makes your socks damp in winter which can lead to cold feet and wet boots. It’s worse if you camp out because your boots and/or boot liners will freeze overnight unless you sleep with them. Putting on frozen boots the next morning is worse than bad. You can prevent perspiration from wetting the interior of your boots by wearing oven-roasting bags over your bare feet or your socks. Spraying or applying antiperspirant gel to your feet before you put on your socks also helps cut down on foot perspiration, if the thought of wearing oven bags is too extreme for you.

3. Wear rain pants or insulated pants with full-length side zippers so you can put them on and take them off without taking off your boots.
It’s important to bring some kind of windproof and waterproof outer pants layer on winter hikes, so you can put them on over the pants you’re wearing when they’re needed. Inexpensive rain pants like Marmot’s Precip Full Zip Rain Pants have zippers that run the length of the pant legs, so you can vent them while walking, and put them on or remove them without having to take off your boots. That’s a big deal in winter because you don’t want to stop for very long to avoid getting chilled and taking off your boots anywhere outside a tent is usually a bad idea.

4. Sleep with your wet gloves, hats, and boot liners in your sleeping bag.
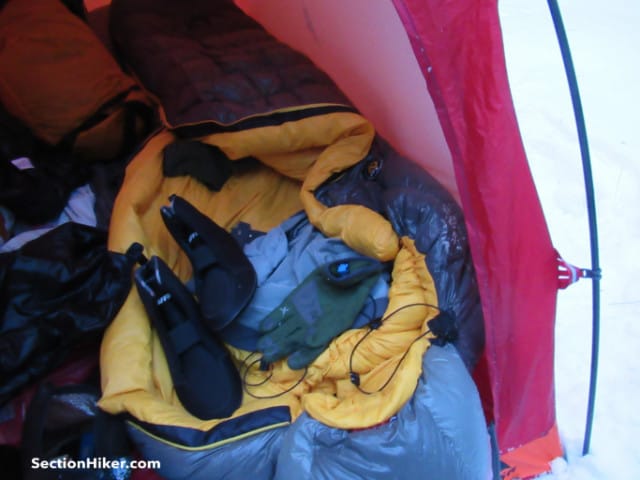
Moisture management is one of the biggest challenges of winter backpacking, especially when it comes to gloves, hats, and boots. You need to dry them at night, even when it’s freezing outside. The only good way to do this is to sleep with them in your sleeping bag. True, it will add moisture to your bag’s insulation, but if you’re just out for one or two nights, that’s unlikely to affect you much. While it’s tempting to kick them down to the foot end of your sleeping bag, they’ll dry much faster and more thoroughly if they’re positioned closer to your torso since it releases more warmth than your feet. Drape damp gloves and hats over your belly or shoulders and sleep with your boot liners by your sides. I also like to sleep with my softshell pants, so they’re not freezing when I put them on the next morning.

5. Camp near running water so you don’t have to spend hours melting snow.
It takes a little planning, but if you can camp near running water, you might be able to get water without having to melt it. You’ll still need to filter or purify it, but this can be a big time saver and eliminate hours of outdoor snow-melting. Be sure to bring a shovel or ice axe to break any snow and ice cover, if necessary.

6. Pie tins make good stove stands for white gas stoves
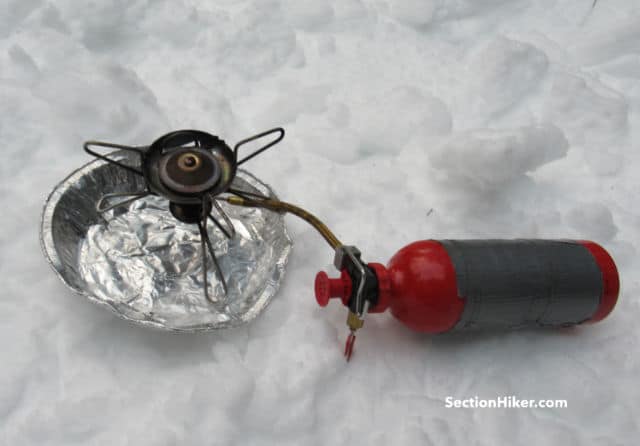
When melting snow with a powerful white gas stove, you want a stove stand that will reflect heat up toward the stove and not sink into the snow it’s resting on. Aluminum pie tins make good stove stands for this and are easy to pack in your backpack. They’re also easy to bend back into shape if they get a little bent up in the process.

7. Load snacks into a 16 oz Nalgene so you can snack on the move.
Fill up a small wide-mouth bottle with gorp and attach it to your shoulder strap, so you can snack while you’re hiking or snowshoeing without having to stop. You expend more calories when winter hiking than you can eat in three square meals, so it pays to stoke your boiler while you’re on the move. Gorp or nuts are good because they won’t freeze together in the bottle, they’re highly caloric, and they’re rich in fats which won’t make you feel jumpy or sleepy the way that a lot of sweets can.

8. Aluminum crampons are significantly lighter weight than steel ones.
While aluminum crampons are less durable than ones made from steel, they’re also significantly lighter in weight. If you only use them to walk on packed snow and ice, you can get several seasons out of them. If you’re trying to shed gear weight, and you need full crampons, this is low-hanging fruit. For example, the steel CAMP USA Stalker Universal Crampon (the most popular crampon sold by REI) weighs 940 grams, while the aluminum CAMP USA 490 XLC Crampon (shown below) weighs 585 grams. That’s a 12.5-ounce weight saving and makes a big difference in your pack and on your feet.

9. Place isobutane gas canisters in a saucer of hot water in cold temperatures.
Upright isobutane gas stove canisters won’t ignite between 15- 20 degrees (F) outside because the gas is too cold to vaporize. While you can warm the canister by keeping it inside your coat, burning the gas will generate a layer of frost on the outside of the canister and cool the contents down again. You can fool the canister into thinking it’s hot outside by placing it in a shallow dish of hot water, which will keep it going full blast. This is useful if you need to melt a lot of snow for drinking water. Be sure to periodically refresh the hot water to keep the charade going. A plastic frozen dinner dish makes a good water dish because it’s lightweight and easy to pack in a backpack.

10. Wear Neoprene Overmitts over your trekking pole handles. Your hands will stay much warmer and you’ll use fewer pairs of gloves.
If you use trekking poles, you can cover the handles with Neoprene pogies (overmitts) like the ones that cyclists and kayakers use in winter. They create a warm and windproof micro-climate inside so you can use them with lightweight wool or fleece gloves, even on frigid cold days. You’ll wet out far fewer pairs of gloves during the course of a day and your hands will stay comfortably warm. Barmitts is a good brand to use with trekking poles that have conventional handles. (I recommend the bike gloves linked here, rather than the XC/Snowshoeing Mitts they make which are smaller and capture less heat.) You’ll be amazed. They’re great for winter mountain biking too.

 SectionHiker.com Backpacking Gear Reviews and FAQs
I would’ve led with the ice axe tip… ;) Thanks for doing all this!
That one is less of a hack and more of a basic skill. It distresses me no end how many people get it wrong. It’s like carrying a gun with the safety off and tucked in the front of your pants.
Exactly. I lost count of all the times I had to remind somebody how to put an ice axe on their backpack in a group.
Since I’m in a wise-guy mode this morning, I have to ask about #8 (put the canister in hot water so you can light it): if the canister won’t light because it’s too cold, where are you going to get the hot water?
Sorry – couldn’t resist! (You don’t need to respond to this.)
If you are using a Nalgene as a hot-water bottle at night, I find it will still be warm in the morning.
That same question has always been on my mind, too.
In the absence of any available hot water, as Tom C suggests, I guess you’re screwed.
Turn to the guy who brought the white gas stove and ask for some of his hot water.
Keep some hot water in the insulated bottles you carry on winter hikes.
You can put the canister in your jacket to heat it up. Then quickly use it while it’s warm to boil some seed water for the dish. But the best option is to use some of the hot water you’ve held back from drinking from your insulated containers, to use in the dish. After all, you have to carry hot water with you to use as a seed when melting snow or you’ll burn a hole through your pot. It doesn’t have to be super hot…but if it’s 40-50 degrees, that should work fine to start.
If you’re using purely Butane gas the boiling point is -0.4*C so as long as the water you’re using is not frozen i.e. 0*C and above you should be ok. Propane is much better in seriously cold temps, boiling point -42*C and isobutane about -11*C.
No Boiling = No Vapourisation = No Gas
Well, you should have some liquid water saved anyway for end of the day as seed water for melting snow. Otherwise it’s much more long, and you risk burning through your pot. Or you can use one body temperature liquid you might be still carrying with you :D
But I would slightly advise against using hot water – isobutane mixes are good for under -11C (the vapourisation temperature of the hydrocarbon mixture depends on the precise mix, it’s not like 70:30 propane:isobutane mixture has two discreet temperatures), you can warm up the container under your jacket, but you don’t want the water to be hot! Liquid water is quite enough.
Just keep it slightly over 0C and you are usually good when using 4-season gas mixtures. You don’t want to risk overheating the container!
…That’s what the carbon felt alcohol stove is for…
Regarding the Barmitts, do you thread the trekking poles in the opens that are normally used to accommodate the handlebars? Wouldn’t a neoprene over-mitt with no openings, other than those for your hands, create a warmer micro-climate than the Barmitts with the handlebar openings?
The problem with an over mitt is that you have to take it off if you want any dexterity. With the Barr mitts you just slip your hands, covered with a thin liner out. Very fast.
YAMA Mountain Gear is now making insulated pogies, which have been awesome my past few trips. They stay on your wrists so you can continue using them as a mitten alternative when not using your poles. The opening that goes over the pole handle has a magnetic zipper, so it automatically seals up snuggly against the pole, closes right up when you want to use it as a mitten, and opens easily when you need to get your hands out for tasks that require a bit more dexterity. My hands have never felt more cozy in the winter!
I do snacks in a container, but rather than one large one, i have a couple of smaller ones (6–8) ounces filled with different things which i carry in a belt pocket and/or waist pack so i don’t get too sick of eating just one thing. I refill these from the main supply in resealable plastic bags in the main food bag at the end of the day or at lunch.
Favorite snacks of this type include honey-roasted peanuts, a mix of flavored almonds and coconut flakes, and a gorp-type mix, usually tamari-roasted soy nuts, carob chips, raisins, and sunflower seeds. There’s a mix of flavored sunflower and pumpkin seeds from Go Raw that’s good, too.
I use Pacerpoles in winter (and occasionally in warmer seasons). I also use Pacermitts (neoprene). What a difference! I’ve been up in the Whites on some very cold days and the hands are so warm. Lightweight gloves (I generally go with insulated mechanics gloves for the added dexterity). I’ve had days up there, temperatures in the teens and the mitts micro-climate is such that I’ve taken the gloves off so bare hands inside the mitts. The one thing you have to be aware of (same as the rest of your body) is overheating and a bit of condensation inside the mitts can lead to cold hands. The Pacermitts are designed so that they can be folded back on themselves allowing more air circulation.
I use them too. If my hands get too warm I just let them drop down the pole to the first joint and hike mitt-free.
I just did a hike in 0 degree temps with a -35 degree wind chill with a pair of posssum down gloves.
Philip – is there an advantage to using roasting bags over your feet instead of plastic bread bags? Also – do you have a recommendation for full side zip insulated pants? Thank you!
Bread bags are too small to fit over my feet.
I am just wondering, it says put the oven bags over your feet or socks. So, why then do they need to fit over your boots?
Seems like the elastic on the oven bags could be an advantsge over bread bags. Also it seems oven bags might be more durable because they’re meant to be heated.
I’m confused though, do you put them over your boots when they’re not on your feet? Is that why they need to fit over boots?
I mis-typed. Bread bags re too small to fit over my feet. Good catch.
Black Ovis makes an relatively affordable down full zip pant. They are certainly not made for bushwacking, only when you are sitting around camp.
Don’t camp too close to water. A lot of condensation occurs on your tent and it’s much colder near water. If you do camp near water, camp higher above the water source. I deal with snacks inside a fanny pack. Get a proper fanny pack for your situation. Look at structurally different ones, as in placement of parts and the ability to wear it different ways. To melt snow and take a day break, have average sized plastic snap/zip bags, and do odd jobs during the day as you place snow in bags and let them sit on top of rocks. Did this one day when I was caught post-holeing up to my hips for over a mile, with more further, in the Sierras. Found a rock island, set up camp, melted snow, created rock walls, ate, and slept till 3am. Poured the water into a bottle and filtered. The strategy was to wait for the snow to be frozen again before continuing on crampons.
Hard to avoid water when you’re camping on 10 feet of snow. But you are correct to avoid sleeping directly next to running water.
These are intended as real winter hiking hacks, when the temperature is so cold that you’re unlikely to find enough sun to melt snow.
#2.-> Not oven bags for foot VBLs but 3 mm CLOSED CELL NEOPRENE DIVERS’ SOCKS.
This VBL insulates better than any socks and thus no need for them except thin polyester liner socks.
Been using them for two decades with great success from everything to felt pacs to my Merrill Moab GRTX hiking boots, Scarpa T3 Tele boots, etc.
I find that silnylon socks are better than neoprene because they’re thinner and don’t affect your boot size. I’d used to wear them with a liner sock though.
https://www.campsaver.com/rab-vapour-barrier-socks-men-s.html
But those oven bags work just as good I find.
While not as cheap as oven bags, Wiggys makes a great “sock” that realeases any moisture and helps keep my feet toasty, even in bean boots. (Although I dont hike in my bean boots!)
I would just attach a warning to the advice of using hot water to get gas canisters going in low temps. Liquid (even just a bit above freezing or at most at body temperature, water is quite enough, unless you are running in such low temperatures that you should be burning liquid gas or white gas anyway.
“Hot water” could be taken for anything from body temperature to scalding hot, which, for obvious (but perhaps to some people, like those, who carry their iceaxes the wrong way around on their packs, not so obvious) reasons.
You really don’t want your canister to overheat and rupture, possibly explosively. It is a somewhat remote chance, but it does happen.
Also, if you are melting snow for drinking water, try to get ice when possible. Snow has much lower density (it’s full of air after all) you will have to keep adding to the pot again and again to get a half-full pot of water.
I’ve discovered that a neoprene overshoe (XXL aquasock) w/ a slit cut from ball of foot to heel works better than using a VBL while using thick wool socks and a breathable trail runner (I size up for the thicker sock) in snow while moving. The setup that I have is actually loose enough to circulate fresh air to my feet and sheds moisture while keeping my feet warm.
A lot of great ideas, but I don’t understand the snacks in a nalgene? Why not in a ziplock bag in your hipbelt pocket? Seems like a lot of extra weight to use the nalgene to carry snacks? Is having to remove the nalgene off your shoulder harness and unscrewing it really easier and faster than unzipping your hipbelt pocket and opening a ziploc bag? The ziploc bags can always be re-used for trash.
You can open a nalgene bottle while wearing fleece gloves. You can’t do that with a ziplock.