
The Kate Sleeper Loop is a 2 day, 20-mile backpacking route that climbs four 4000 footers: North and Middle Tripyramid, Whiteface and Passaconaway. The Tripyramids and Whiteface/Passaconaway are usually climbed on separate days by day hikers, but they’re linked together by the Kate Sleeper Trail, and make a nice backpacking route that only requires one substantial climb to bag all four peaks.
The Kate Sleeper Trail runs over two peaks in its own right, West and East Sleeper. The latter is on the New England Hundred Highest peak list, which many 4000 footer graduates go on to complete. The trail was recently damaged by a severe storm that knocked over many of trees on the ridge that it runs over. While the trail has been cleared, evidence of the surrounding devastation is still readily apparent and serves as a reminder of the wild weather that can be unleashed in the White Mountains.
Who is Kate Sleeper? Ms. Sleeper was a 19th-century farmer and innkeeper from Wonalancet, NH, in the heart of the Sandwich Mountain Range, at the foot of these mountains. She was the driving force behind the creation of the local trail system, which she reasoned would draw visitors and commerce to the area. She also organized the Wonalancet Out Door Club (note the oddly spelled name), the local trail organization that built the trails and maintains them to this very day. They’re a wacky, quirky bunch that exudes character but are very competent and dedicated trail stewards

Rating
C3 - Toggle Open for Key
Distance
A: Less than 15 miles in distance
B: 15-20 miles
C: 20-25 miles
D: 25-30 miles or less
E: more than 30 miles
Elevation Gain
1: 3000 ft or less
2: 4000 ft or less
3: 5000 ft or less
4: 6000 ft or less
5: over 6000 ft
Distance/Elevation Gain
20 miles w/5000′ of cumulative elevation gain
White Mountain 4000 Footers
- North Tripyramid
- Middle Tripyramid
- Mt Whiteface
- Mt Passaconaway
Recommended Duration
2 days
Season
June thru October
Permits Required
None.
Regulations
Backcountry Camping Regulations for the White Mountain National Forest.
Most this route passes through the Sandwich Range Wilderness Area. Please observe all wilderness area restrictions.
Trailhead Directions
- Sabbaday Falls Observation Site
- Oliverian Brook Trailhead Parking (2.2 miles east of the Sabbaday Falls Observation Site on Rt 113, the Kancamagus Highway. While perfectly walkable, you may want to spot a car here at the end of your hike. There’s a big parking lot and there are large USFS campgrounds nearby with hot showers.
Maps
The Appalachian Mountain Club publishes the best maps for the White Mountains and I’d recommend buying the complete AMC White Mountain Waterproof Map Set. It contains three waterproof maps (2 regions per map) although you only need carry one or two on any trip. I also use GPS apps for navigating, but these maps contain relevant trail, shelter and topographic information that is often not included in electronic maps. More detailed trail descriptions can also be found in the AMC White Mountain Guide, which is considered the hiking bible for the region. It includes detailed driving directions to remote trailheads and is indipensible for navigating to them, especially when you're out of cell tower range. Take photos of the pages you need using your phone for easy reference, instead of carrying the entire book with you on hikes.Navigation Apps
I also recommend purchasing a GPS Phone App such as Far Out's White Mountain National Forest Guide, which lists most of the trails, trailheads, shelters, campsites, views, and water sources in the White Mountains National Forest. GaiaGPS is another GPS Phone App, which is stronger in terms of topographic map coverage for the White Mountains but does not have as much information about trailheads, shelters, campsites, views, and water sources. I use both frequently.Trail Sequence
The route follows the following trails in sequence.
- Sabbaday Falls Trail – 0.5 miles
- Sabbaday Brook Trail – 4.4 Miles
- Mt Tripyramid Loop – 1.9 miles
- Kate Sleeper Trail – 3.4 miles
- East Sleeper Spur Trail – 0.1 miles
- Rollins Trail – 2.4 miles
- Dicey’s Mill Tr 0.9 miles
- Walden Tr – 0.7 miles
- Square Ledge Tr 0.7 miles
- Passaconaway cutoff 1.7 miles
- Oliverian Brook Tr – 1.9 miles
- 2 mile road walk back to car
20 miles with 5500′ elevation gain.
Scenic Highlights
The following list provides cumulative distances on the route to each view or landmark.
- Sabbaday Falls – 0.25 miles
- North Tripyramid Summit – 5.4 miles
- Middle Tripyramid Summit – 5.9 miles
- South Tripyramid Summit and Avalanche Slide – 6.3 miles
- East Sleeper Spur Trail and Summit – 8.3 miles
- Mt Whiteface ledges – 10.1 miles
- Mt Whiteface Summit Cairn – 10.3 miles
- Mt Passaconaway Summit – 13.6 miles
- Mt Passaconaway View Spur – 13.9 miles
Camping and Shelter Options
- Camp Rich Tentsite (Free) – Maintained by the Wonalancet Out Door Club, on Dicey’s Mill Trail, 0.1 miles past the East Loop Trail Junction
- There are limited options for backcountry camping on this route given the terrain (if you don’t have a backpacking hammock). Your best bet for finding a wild tent site will be along the Kate Sleeper Trail between Downe’s Brook and the Rollins Trail or along the Oliverian Brook Trail. Please observe all White Mountains backcountry camping rules and wilderness regulations and leave no trace.
Water
Natural water sources are plentiful in the White Mountains although you may need to descend to them from ridgelines along side trails if you run short. In any case, carry a detailed topographic map with you and don’t rely on the overview map provided with this trip description to find water sources.
On the Trail

Leave the Sabbaday Falls Observervation Site Parking Area and follow a gravel tourist path for a quarter-mile. A side trail branches left that will take you to a viewing area for the falls, a popular tourist destination, before looping back to the main path. The tourist path leads to the start of the Sabbaday Brook Path, hugging the right side of Sabbaday Brook. This section of trail is heavily eroded but passable and soon turns into a wider path that follows an old logging road.

The Sabbaday Brook Trail is an easy trail to hike, although it does require 7 water crossings. The lower three are the widest and most difficult, but they become much easier if you expect to get wet feet when you cross them. By that I mean, it’s easier to cross them if you don’t mind walking through some water to get to the other side. If you try to rock hop though, you’ll probably hurt yourself if you slip off a slippery rock. The upper four crossings are much narrower and easier. The last one, at about 2960′, is a good place to fill up, because the trail is dry until you reach the Downe’s Brook Trail Junction on the other side of the Sleepers.

The Sabbaday Brook Trail follows old eroded logging roads for most of its length and the path taken by the trail is quite evident. While there are often blazes at the stream crossings, there are few along the trail because you enter a Wilderness Area soon after leaving the trailhead, and remain in it until nearly the end of the route.
The trail climbs gradually and runs parallel to Sabbaday Brook until 3000′. From there it climbs steeply over rock ledge, past several blow-downs to meet the Tripyramid Loop Trail between Middle and North Tripyramid.
When you reach the Tripyramid Trail Junction, turn right and climb North Tripyramid, which is just 0.5 miles west. Retrace your steps back and climb Middle Tripyramid which is 0.3 miles east. Continuing east, summit South Tripyramid, which is 0.4 miles further. While the South peak is 4090′ tall, it’s not considered a distinct 4000 footer because it’s too close to the Middle Peak to count as a separate summit.
Continue east past the summit, before descending steeply down an avalanche slide and section of loose stone. It’s often easier to down-climb the rock ledges if you have a good handhold, rather than tackling them head-on.

The Kate Sleeper Trail branches left off the slide about 200 yards down, but the trail intersection is easy to miss because the sign looks like the tree than it’s nailed to. Someone has painted a yellow trail junction arrow on a rock, which makes it easier to find though.
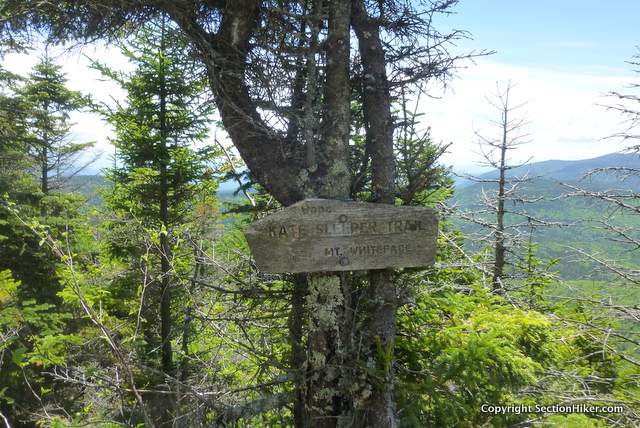
The start of the Kate Sleeper trail also runs down an avalanche slide, until it disappears into thick woods. The trail follows an old logging road through open forest, but there’s little sign of blowdowns along the route on this side of the ridge. The West Sleeper summit is unmarked and you may pass by it without noticing it.
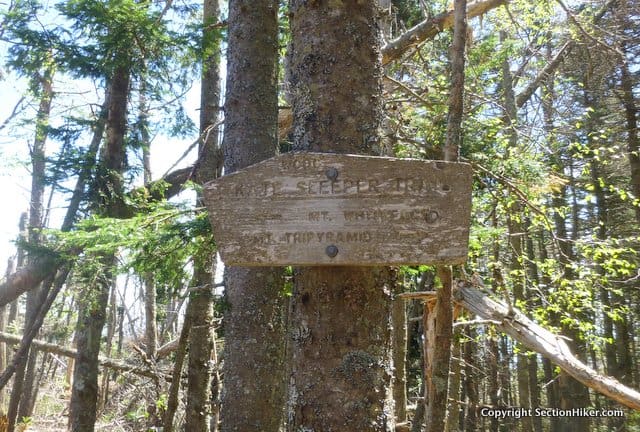
The density of blowdowns in the surrounding woods increases as you near the East Sleeper summit. When you reach a sign indicating the direction to Mt Whiteface, a short spur trail leaves the trail and runs to the East Sleeper summit 0.1 miles away. The spur may be blocked by a fallen log, but you can ignore that and step over it. What you can’t ignore are the 25 massive trees that have fallen over the spur trail and block it. A faint herd path is visible to your left that loops around the obstruction and will lead you to the summit sign.

Retrace your steps to the Kate Sleeper Trail and continue east towards Mt Whiteface. You’ll see an immediate increase in the number of blowdowns on either side of the trail. The trail has been cleared of debris, but the sight of all the downed trees is sublime. Continue to the Downe’s Brook Trail junction.

If you need water when you reach the Downe’s Brook Trail junction, turn left and walk about 20 yards down the trail. The stream access is better here than at the trail junction, where the water flows underground.
Continue east on the Kate Sleeper Trail headed, climbing gradually to Mt Whiteface and the Rollins Trail on 0.8 miles. When you reach the trail junction turn left onto the Rollins Trail. If you want to take a short detour, turn right and walk 0.1 miles to a fantastic view of Mt Passaconaway and the Lake District to the south from open rock ledges.
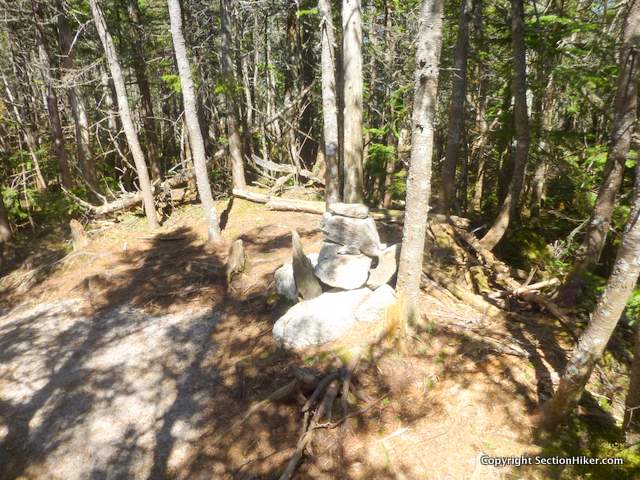
Continue north and then east along The Rollins Trail, while follows the long ridge connecting Whiteface to Mt Passaconaway. It encircles “The Bowl,” a protected amphitheater of old-growth forest far below and the source of the Wonalancet River.

Turn left onto the Dicey’s Mill Trail in 2.4 miles, which climbs steeply to the Mt Passaconaway summit. There is an unmarked spur trail about 0.1 mile above the junction on your left that leads to the WODC Camp Rich tentsite if you wish to camp. There are also a large number of pre-existing campsites just off the trail above the trail junction. While they may seem attractive to camp at, I’d urge you to use the Camp Rich tent site to concentrate your impact on a hardened tent site reserved for that purpose. Otherwise, continue climbing to the mountain’s summit.
When you reach the summit of Passaconaway, there is a signed spur trail marked “View”. Dicey’s Mills Trail ends here, and the Walden Trail begins, running steeply down the east side of Passaconaway. Make sure you follow the right sign on the descent.
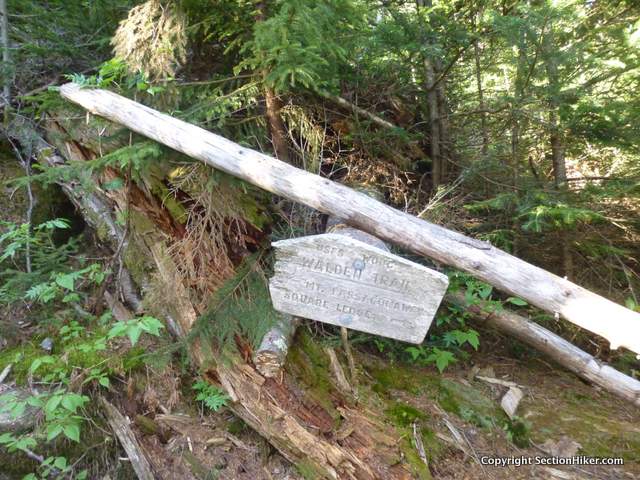
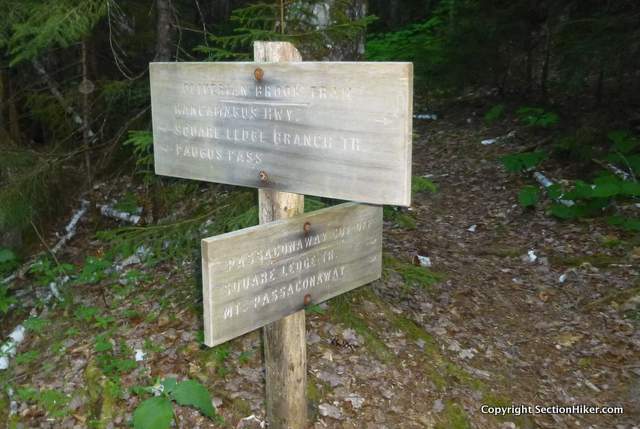
Continue down the Walden Trail for 0.6 miles until you reach a three-way junction with East Loop and the Square Ledge Trail. Turn onto the Square Ledge Trail. Continue for 0.7 miles, passing a small avalanche slide on the right, before following a sign to the Passaconaway Cutoff Trail.
Turn onto the Passaconaway Cutoff Trail and follow it for 1.7 miles. The summit of Passaconaway is visible through the trees if you glance over your shoulder. It’s a unique view, that shows just how steep the mountain is from below. The Passaconaway Cutoff Trail runs high above a stream that you’ll hear far below. The stream is easily accessible on your left when you reach level ground and a good place to resupply your water if you’re short. Continue following the trail through open forest, until you reach the Oliverian Brook Trail Junction.
Turn left onto the Oliverian Brook Trail and follow it for 1.9 miles to the trailhead parking lot, leaving the Sandwich Wilderness. The trail follows an old logging road along beautiful Oliverian Brook, a wild mountain stream with good swimming. Near the end of the trail, you’ll pass by a flooded area that’s been colonized by a hardy beaver family.
Turn right onto the dirt road at the end of the trail, which leads to the trailhead parking lot in about 50 yards. If you’ve left a car here, the route is finished. If you’ve left a car at the Sabbaday Falls Observation Area, walk about 100 yards further to Rt 113 (Kancamagus Highway) and turn left. It’s an easy and flat 2.2 mile road walk on a two-way, two lane road back to your car.
About the author
Safety Disclaimer
This trip plan can not alert you to every hazard, anticipate your experience, or limitations. Therefore, the descriptions of roads, trails, routes, shelters, tent sites, and natural features in this trip plan are not representations that a particular place or excursion will be safe for you or members of your party. When you follow any of the routes described on SectionHiker.com, you assume responsibility for your own safety. Under normal conditions, such excursions require the usual attention to traffic, road and trail conditions, weather, terrain, the capabilities of your party, and other factors. Always check for current conditions, obey posted signs, and Backcountry Camping and Wilderness Area Regulations. Hike Safe and follow the Hiker responsibility code.Click for More Free 4000 Footer Backpacking Trip Plans
- Presidential Traverse
- Pemigewasset Loop
- Bonds Traverse
- Twins/Bonds Traverse
- Kilkenny Traverse
- Carter Wildcat Traverse
- Southern Presidentials Loop
- Moriah Loop
- Kate Sleeper Loop
- Howker Ridge Loop
- Isolation Loop
- Mad River Notch Loop
- Thirteen Falls Loop
- The Desolation Loop
- Willey Range Loop
- Firewardens Loop
- Carter Moriah Loop
- Cannonball Loop
- Tunnel Brook Loop
- Carter Dome Wild River Loop
- Mt Carrigan and Mt Nancy
 SectionHiker.com Backpacking Gear Reviews and FAQs
Thank you Phil for these comprehensive guides. I have been making my way through your White Mountain Loop Hikes and use your guide to prepare every time. What a great resource!
I finished this loop yesterday and had 1 correction to make. When descending the Walden Trail, the Dicey Mills Loop trail intersects at around 0.6 with a simple sign pointing right to the Dicey Mills loop. Continue left on the Walden trail and in another 0.1 the Square Ledge Trail branches off from the Walden Trail on the left.
Thanks – would you believe I was there yesterday? Hiked an Oliverian, Square Ledge, Pass Cutoff, Walden Loop. Damn was it hot!
The connector trail that takes you to the Diceys Mill Tr is called the East Loop Trail, I’m pretty sure. I’ll check tonight.
Planning to do this at the end of August. Is camp rich still a viable camping option? Thank you for all the info!
I echo Frank’s comment, but would add: do you have info on water sources around Camp Rich?
It’s still there.
There’s a stream that crosses the Dicey Mill Trail next to the campsite. Whether it’s flowing or now, I can’t say. I really highly recommend you get Guthooks NE hiker app which has all the water sources marked. Otherwise, carry extra water or camp low.
Hi Philip,
Thank-you for this trail guide. We are new to backpacking and this is the perfect route for beginners. We loved navigating through the Wilderness area and this route was jammed pack with beautiful and interesting sights. We also really appreciated the heads up for the Kate Sleeper turn-off. Also the Camp Rich Tent site is an oasis.
Best Regards,
Chris & Jill
Glad you had a good time. Thanks for your note.
What a great loop and new way to rediscover Whiteface & Passaconaway. The forest hiking was a nice change of terrain from the rocks of the higher peaks.
I never would have imagined this loop on my own. Thanks you for the guide (and gear reviews too!)
Regards,
Dan O
That is a nice way to approach those peaks!
Hi Phil – Curious if this loop avoids Blueberry Ledge? I believe so from looking at the map/trails taken, but I’d love confirmation! Many thanks – great hikes on your site!
I finally got to this route this past weekend in the pouring rain. It was a fantastic route, though the slide was a bit sketchy when wet. Thanks for posting these guides.
Glad you had fun. I’ll be expanding the trip list this summer and autumn.
How do you ratings of difficulty work? I see 4 stars but it then says 3 out of 5?
Similar issue- on the review of Mt Nancy & Carragain it lists 4 stars but says 5 out of 5?
Not sure where you’re seeing these discrepancies, but I have been meaning to redo my rating system over the holiday. As for difficulty, if you haven’t ever hiked in the Whites, I’d say all of the trip plans are 5’s, as in very difficult. There’s no way to sugarcoat this. Climbing up these peaks with 30 pounds on your back is hard. That said, I’m about to add a list of easier trip plans that are one night long and bite off a little less at once to get people up to speed with backpacking in the Whites.
Thanks. I’ve done several trips in the Whites with my boys (now ages 13 and 14). For their first overnight, I took them to Sawyer Pond from the 112 which was a great beginning. After that, we did Three Ponds loop which was a nice intro to elevation gain. Next, we did The Flat Pond loop which was a step up in elevation. We just recently did the North Kinsman via Lonesome Lake. Hoping to do the next step up with 2 nights…Thanks for your blog and I encourage you to write about these above easier routes which I couldn’t find anywhere online when I first wanted to introduce my boys to backpacking (had to my own map searching and route making).
Hi Philip,
Just got back from a wonderful overnight following this guide. Unfortunately, I ended up cutting the loop short and bailed out at the Downes Brook Trail after waking up to a heck of a lot more snow than the summit forecast alluded to – I’ll be back for Whiteface and Passaconaway another time.
Wanted to reach out and let you know that they put up a spiffy new sign on the South Slide junction with Kate Sleeper! It is incredibly hard to miss now and might be worth adding a note to this guide – happy to provide a picture of it as well if you’d like.
Thanks again for all the work you do on this site, it is truly worth its weight in gold.
AK
Do send me a picture. I liked that old sign though. It had character.
Will do!
Not to worry, the old sign is still there too.
I agree 100%. I really liked that sign and it was sad news to me when I heard they put up a new one. Glad to hear it hasn’t been removed. I did my first backpacking trip in the southern whites in about 1987 or so and part of the trip was the south slide to Kate Sleeper. Went back a few times since and well you know, memories. I believe I have photos of it I can send you as well.